Your Teen’s First Driving Lessons
A step-by-step guide to the parking lot sessions that build pedal control, steering, and stopping skills before your teen enters traffic.
Start the parent programTeens with actively involved parents are 50% less likely to crash in their first year of driving.
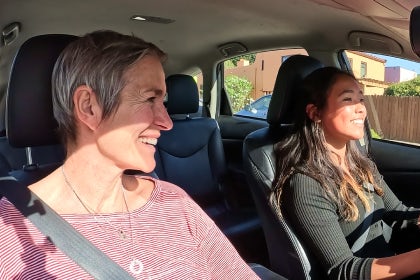
What should my teen’s first driving lesson look like?
A first driving lesson starts in a parked car, not on the road. Your teen learns the controls, adjusts the seat and mirrors, and practices the brake-to-gas pivot before the vehicle moves. Once in an empty parking lot, they drive forward and back at idle speed, learning to stop smoothly before adding acceleration.
The Zutobi Parent Driving System, the five-phase program that structures your teen’s supervised practice, covers each of these skills in Phase 2 with video-led coaching from certified driving instructor Jacqueline R. Each parking lot session builds one skill at a time so your teen is ready for residential streets by the end of the phase.
First lessons are Phase 2 of the Zutobi Parent Driving System’s five phases: permit prep, first drives, skill development, real-world driving, test readiness. Your teen arrives holding a fresh permit and leaves with the pedal, steering, and stopping control that residential streets in Phase 3 demand.
Every phase, with its readiness checkpoints, is mapped on the learning path.
Managing first-day nerves
Most teens feel anxious before their first time behind the wheel, and so do most parents. Naming that nervousness early takes the pressure off both of you and makes the first session easier.
Before the car moves
Your teen’s first two sessions happen with the car parked in the driveway. These sessions build the muscle memory and spatial awareness that prevent fumbling once the car is in motion.
- Vehicle orientation
Walk your teen through the steering wheel, turn signal lever, pedal layout, dashboard warning lights, parking brake, and gear selector. Have them practice flicking the turn signal with their middle finger, left hand on the wheel, without looking down.
Instructor Jacqueline R. compares the turn signal to playing an instrument. Have your teen repeat "Left, Off, Right, Off" until flicking the lever feels automatic.
- Seat and steering wheel setup
Adjust the seat back so the shoulder aligns with the B-pillar, the frame between the front and back windows. Raise the seat as high as headroom allows for a clear view over the dashboard.
Slide the seat forward until the knees stay slightly bent at full pedal press. The left foot rests on the dead pedal (the ramp on the far-left floor) to ground the body and provide stability.
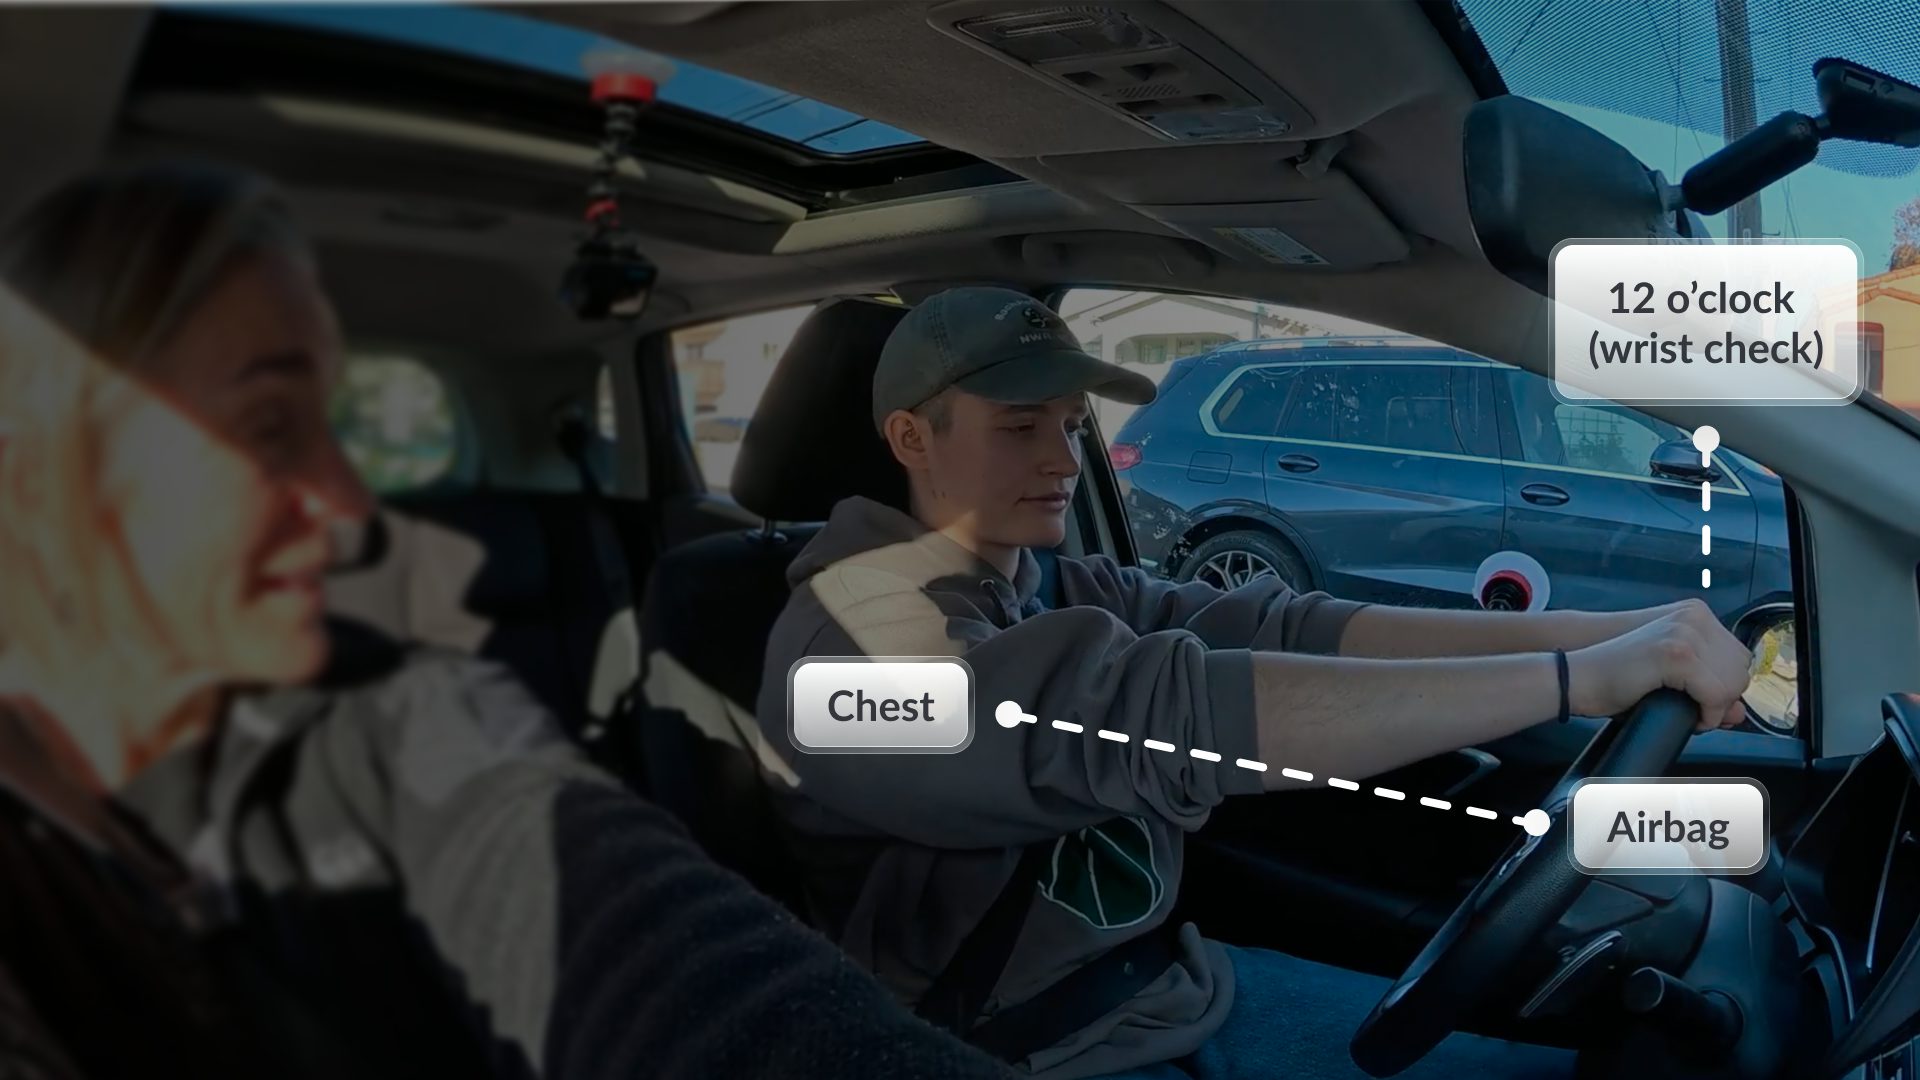
With the seat set right, the chest stays a safe distance from the airbag. - The Wrist Flex Test
Have your teen extend both arms over the steering wheel. Their wrists should rest on the top of the rim without their shoulders lifting off the seat back.
When they drop to the 9-and-3 driving position, elbows will be relaxed and slightly bent. If the wrists can’t reach, adjust the steering column depth or slide the seat forward.
Nervous drivers squeeze their knees together. Have your teen spread their knees into a V-shape so the bottom of the steering wheel sits between them, creating a stable base that aligns the right foot for a clean pedal pivot.
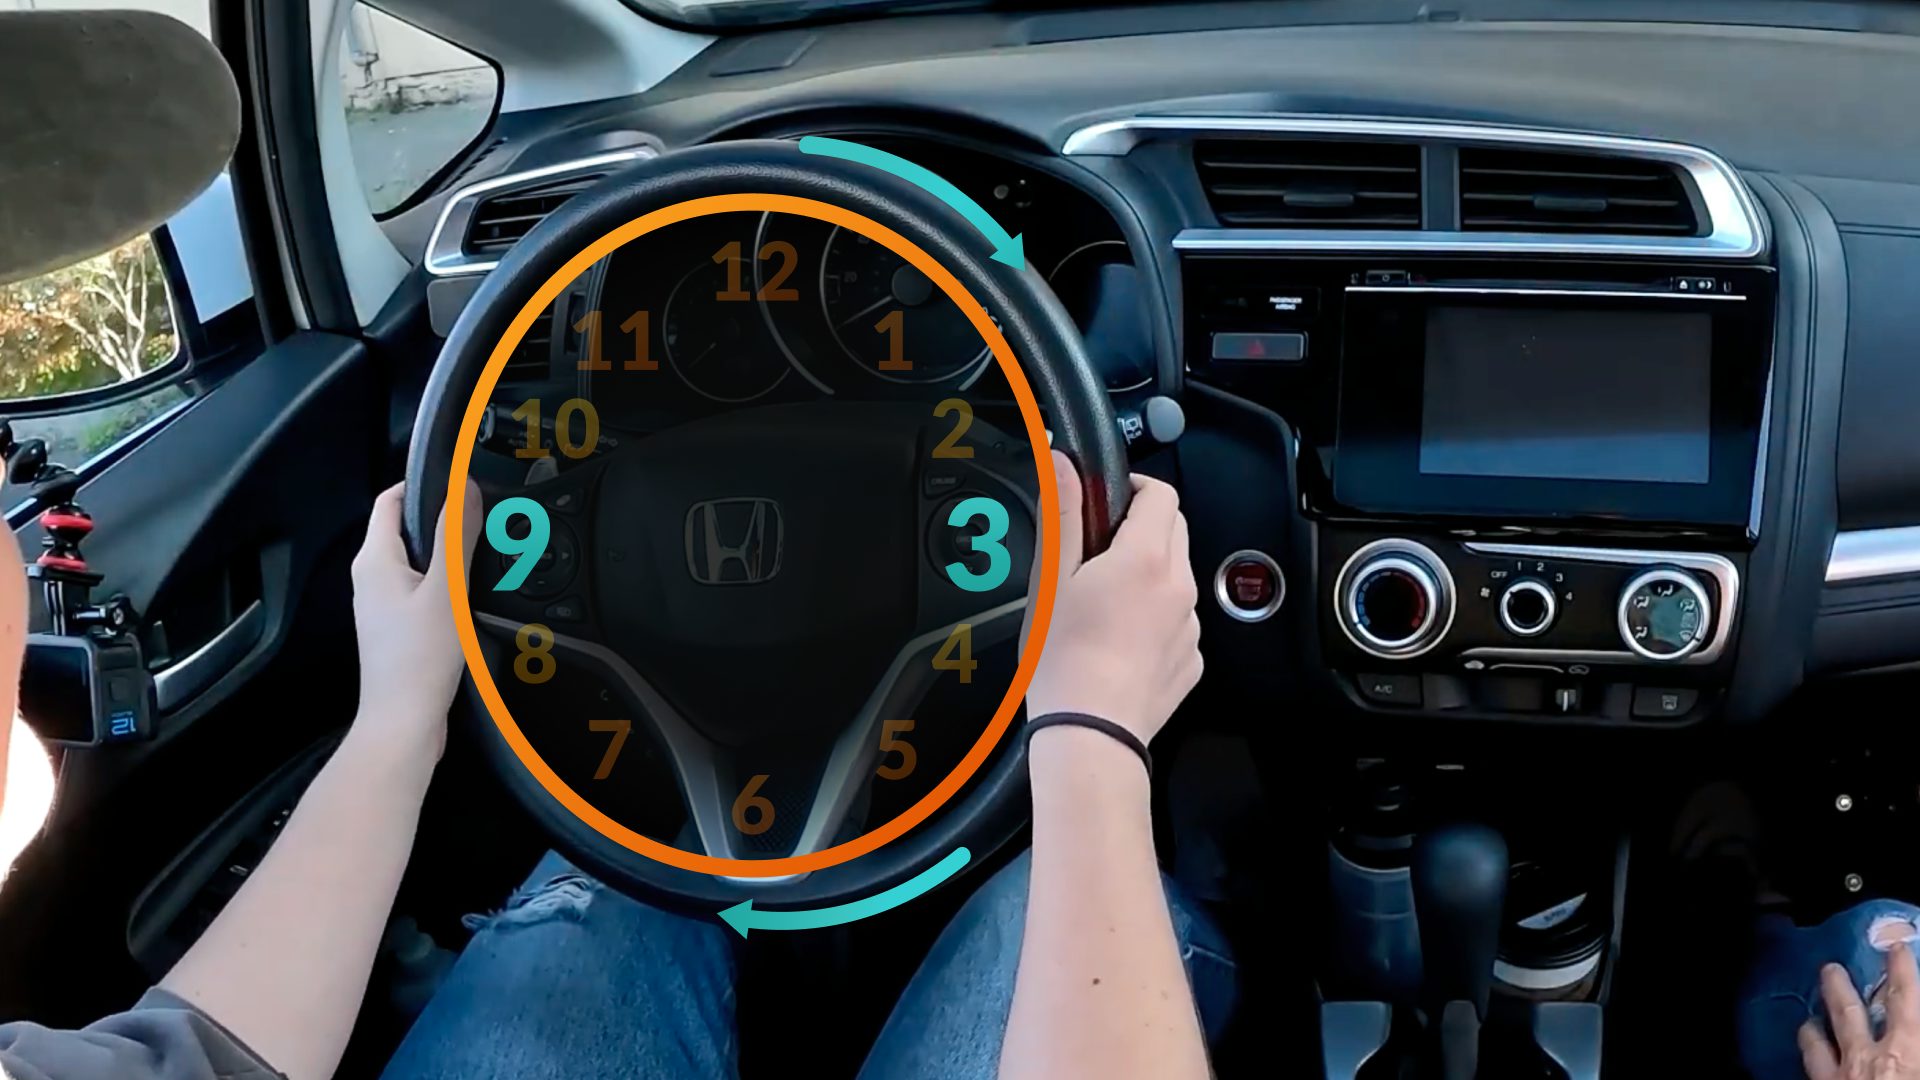
Hands at 9 and 3, wrists resting at 12 — the Wrist Flex Test. - Mirror setup
The rear-view mirror frames the entire rear window. Each side mirror shows about 20% of the car and 80% of the road.
For the left mirror, instructor Jacqueline R. uses the back door handle as a reference point: it should sit in the bottom-right corner of the mirror. For the right mirror, the front door handle pocket sits in the bottom-left corner.
Remind your teen that objects in the right mirror are closer than they appear.
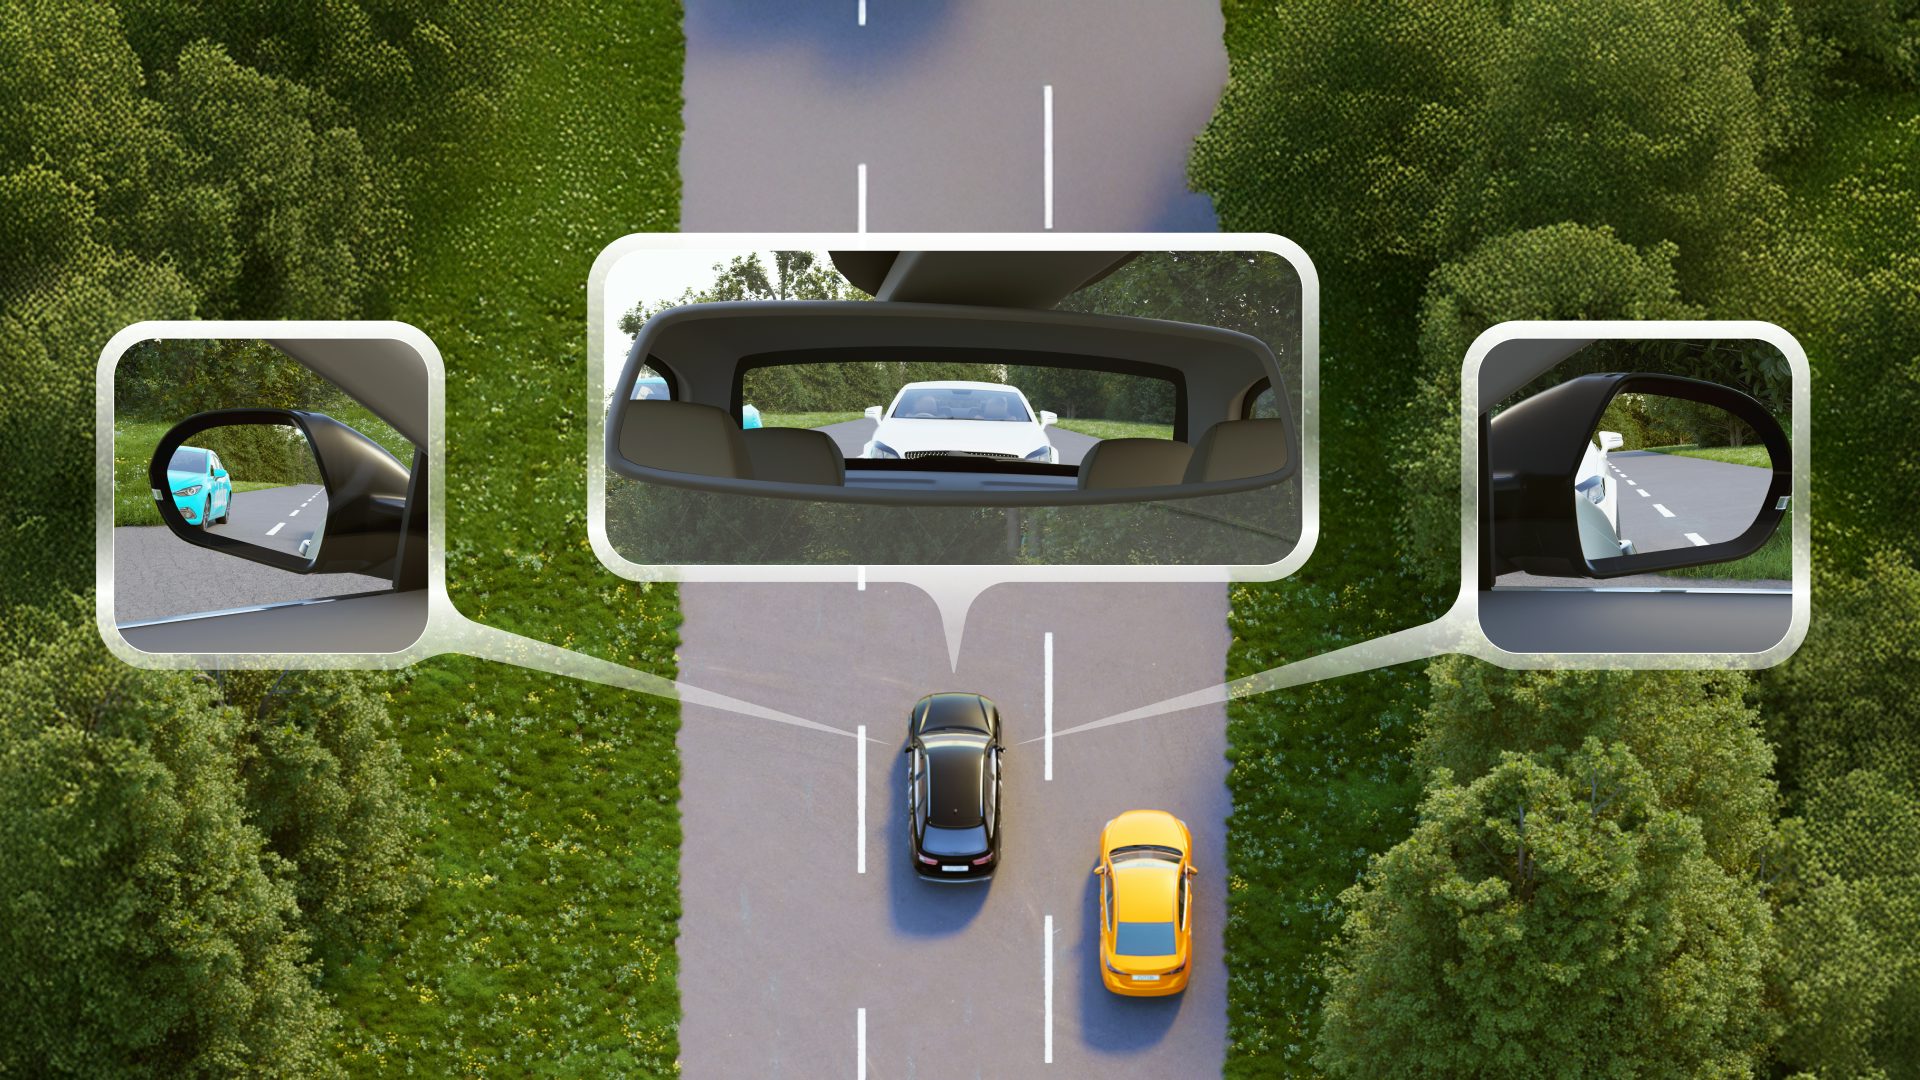
Rear-view plus both side mirrors, set so surrounding traffic stays visible.
Pedal control and the pivot
Pedal confusion causes more parking lot crashes than any other new-driver mistake. The fix is a specific foot technique practiced in the parked car and reinforced every session.
The left foot stays on the dead pedal for the entire drive. The right heel plants on the floor in front of the brake.
To accelerate, the foot rotates right toward the gas. To brake, it pivots back left. The heel never lifts off the floor. Instructor Jacqueline R. teaches this as "Straight is Gas, Pivot is Brake." Your teen only needs the ball of the foot on the right half of the brake pedal. If the heel keeps sliding, go back to the "open the knees" V-shape to realign the foot.
For normal driving, hands stay at 9 and 3. To turn, the opposite hand pushes up while the turning-side hand pulls down. Hands slide along the rim and never cross. Think of passing a pizza slice from hand to hand. Hand-over-hand is for slow maneuvers only: parking lots, U-turns, tight corners. Instructor Jacqueline R.’s rule: "Hand-over-hand only on Slow Land."
Steering degrees. Your teen should practice how much input each type of turn needs.
- 1/8 turn (45°):a gentle lane curve.
- 1/4 turn (90°):a standard intersection turn.
- 1/2 turn (180°):a sharper turn.
- Full turn (360°):parking or U-turn territory.
Have them call out the degree as they practice while parked. This connects the feel in their hands to the result on the road.
Forward and back at idle speed
Drive your teen to a spacious, empty parking lot. Set up three markers roughly 150 feet apart: a start point, a midpoint, and an endpoint.
Existing painted lines and arrows work well as visual markers. If the lot is featureless, use cones or water bottles.
Shift into Drive. Your teen lifts their toe off the brake and lets idle power roll the car forward. No accelerator. They stop at the midpoint by pressing the brake, then repeat the same exercise in reverse.
Your teen pivots from brake to gas and accelerates smoothly to 10 mph. At the midpoint, they pivot back to brake and stop.
Full run from start point to endpoint and back in reverse. Focus on steady speed and straight-line tracking.
Accelerate, then give the command "Stop." Your teen brakes hard. This builds the "stomp and stay" reflex for emergencies. Repeat until the stop feels automatic, not scary.
Instructor Jacqueline R. calls this "Stop-Park-Power-Brake-Exit." Make it a non-negotiable routine from the first session.
Adding turns
Once your teen controls the pedals and stops with confidence, introduce turns in the same parking lot. Left turns come first because they have a wider radius and more room for error.
Drive the perimeter of the lot making only left turns in a large rectangle. Your teen drives forward until their shoulder or the side mirror aligns with the end of the parking line.
Turning early cuts the corner. On real roads, that means crossing into oncoming traffic.
Instructor Jacqueline R.’s "Slow In, Power Out" technique: approach the turn slowly with the foot covering the brake. As the wheels straighten on exit, apply gentle gas to help the steering wheel slide back to center through the palms.
Right turns need a tighter radius and more steering input, often a full 360° plus an extra quarter-turn. Have your teen hug the curb or line on the right side.
They can track the curb through the small triangular window at the bottom-right of the windshield. Practice a loop of right-turn-only laps until both common errors disappear: swinging wide into the opposite lane and clipping the inside curb.
To reset position or finish the lesson, practice reversing into a parking spot. Your teen looks over their right shoulder and uses the door handle as a distance gauge relative to the parking line.
Left hand sits at 12 o’clock on the wheel. Right arm drapes over the passenger seat to help twist the body and see behind.
Lane changes and emergency swerves
These parking lot drills prepare your teen for situations they will face at highway speeds. Practice in an area with room in every direction.
Teach the full sequence: rear-view mirror, signal, side mirror, blind spot shoulder check, go. The wheel moves less than 30° in either direction.
Countersteer gently to straighten in the new lane, then cancel the signal. Watch your teen’s hands during the shoulder check: drivers often pull the wheel toward the direction they turn their head.
Your teen accelerates toward a double-cone setup. At the swerve point, they release the gas and quickly turn the wheel 90° in the swerve direction, then immediately counter-steer 180° the opposite way.
The car will sway. Once realigned, they check the rear-view mirror and brake hard.
No braking during the swerve itself. Start at low speed and increase as control improves.
Add a second obstacle after the first swerve. From the starting point, call "left" or "right" to set the first swerve direction.
Your teen swerves around the first obstacle, then immediately swerves around a second before executing a quick stop. Mistakes here are expected and valuable, because a controlled parking lot is the safest place to learn what a swerve feels like.
What to save for later
These belong on residential streets and highways (Phases 3 and 4), not in the first lessons:
Adding complexity before your teen controls the basics creates stress, not skill. Master the parking lot first.
Giving feedback during practice
Give feedback after the maneuver, not during it. Correcting mid-turn splits your teen’s attention between the instruction and the driving task.
Start with what your teen did right before naming what to fix. "Your pivot was smooth that time. Next run, try braking a little earlier." One correction per repetition is enough.
Before a maneuver, give one clear instruction with enough lead time to act on it. After it, name one thing that went well and one thing to adjust, in that order.
Avoid sudden panic commands unless there is real danger, since they startle more than they guide. Skip stacking several corrections at once or criticizing during the maneuver itself.
Treat mistakes as a normal part of learning, not a failure. A teen who feels safe making errors in an empty lot improves faster than one who is afraid of getting it wrong.
Key first-lesson takeaways
The parking lot phase comes down to a few principles:
Start in a parked car to learn the controls before the vehicle moves.
Practice in a large, empty parking lot away from traffic.
Master smooth stopping before adding the gas pedal.
Introduce one skill per session so your teen is never overwhelmed.
Keep sessions short, around 30 to 45 minutes, and end on a positive note.
Close every lesson with the same shutdown routine to build the habit.
Signs your teen is ready for streets
Before moving to residential streets (Phase 3), look for these four things:
- Stops smoothly at a target without prompting.
- Pivots between brake and gas without looking at their feet.
- Checks mirrors before reversing without being reminded.
- Maintains steady speed on straight runs.
If you still prompt any of these, stay in the parking lot for another session.
Inside the Zutobi Parent Driving System
Phase 2 of the PTTG covers every skill on this page across multiple video-led lessons. Each lesson names the skill, the coaching language, the common mistakes, and what "good" looks like from inside the car.
First Driving Lessons FAQ
How long should my teen’s first parking lot session last?
Should my teen use the gas pedal on the first day?
What is the pivot and why does it matter?
How do I set up a practice area in a parking lot?
What is "Slow In, Power Out"?
When should my teen practice emergency swerves?
What is Stop-Park-Power-Brake-Exit?
Does my teen need a professional instructor for these lessons?
Follow a Structured System Inside Zutobi
Give your teen the safety advantage that research supports. Start the Zutobi Parent Driving System.
Start for free


