Driving Lesson Checklist for Parents
Every safe driving lesson starts before the engine turns on. Use this checklist to prepare the car, set up the cabin, and run a focused practice session.
Start the parent programTeens with actively involved parents are 50% less likely to crash in their first year of driving.
What should I check before a teen driving lesson?
Check three things before every session: the vehicle exterior, the cabin setup, and your communication plan. A walk-around catches tire problems and blocked sight lines. A consistent seat-and-mirror setup gives your teen the same reference points every time they drive.
The Zutobi Parent Driving System covers the full pre-start routine and vehicle setup in its opening video lessons, so you and your teen follow the same steps each time.
Pre-drive checklist
Walk around the vehicle before your teen gets in. Once this becomes routine, it takes 10 to 30 seconds.
Exterior walk-around
- Have your key or key fob in hand.
- Check tire condition and look underneath for fluid leaks.
- Scan your intended path of travel and move any obstacles.
- Confirm all windows are clean and clear.
- Secure loose objects in the trunk or cargo area.
- Check the area around the vehicle before opening the door.
Interior check
- Enter the vehicle, close the doors, and lock them.
- Confirm the parking brake is engaged and the car is in Park.
- Secure your teen's phone out of reach.
- Adjust seat, steering wheel, and mirrors (covered in the next section).
- Buckle up and verify all passengers are belted.
Vehicle setup checklist
Get the seat, steering wheel, and mirrors right before every session. Even small changes in posture shift a new driver's sight lines and pedal reach.
Seat position
- Recline the seat back until the shoulder aligns with the B-pillar, the frame between front and back windows.
- Raise the seat for a clear view over the dashboard and windshield wipers.
- Slide forward until the knees stay slightly bent at full pedal press.
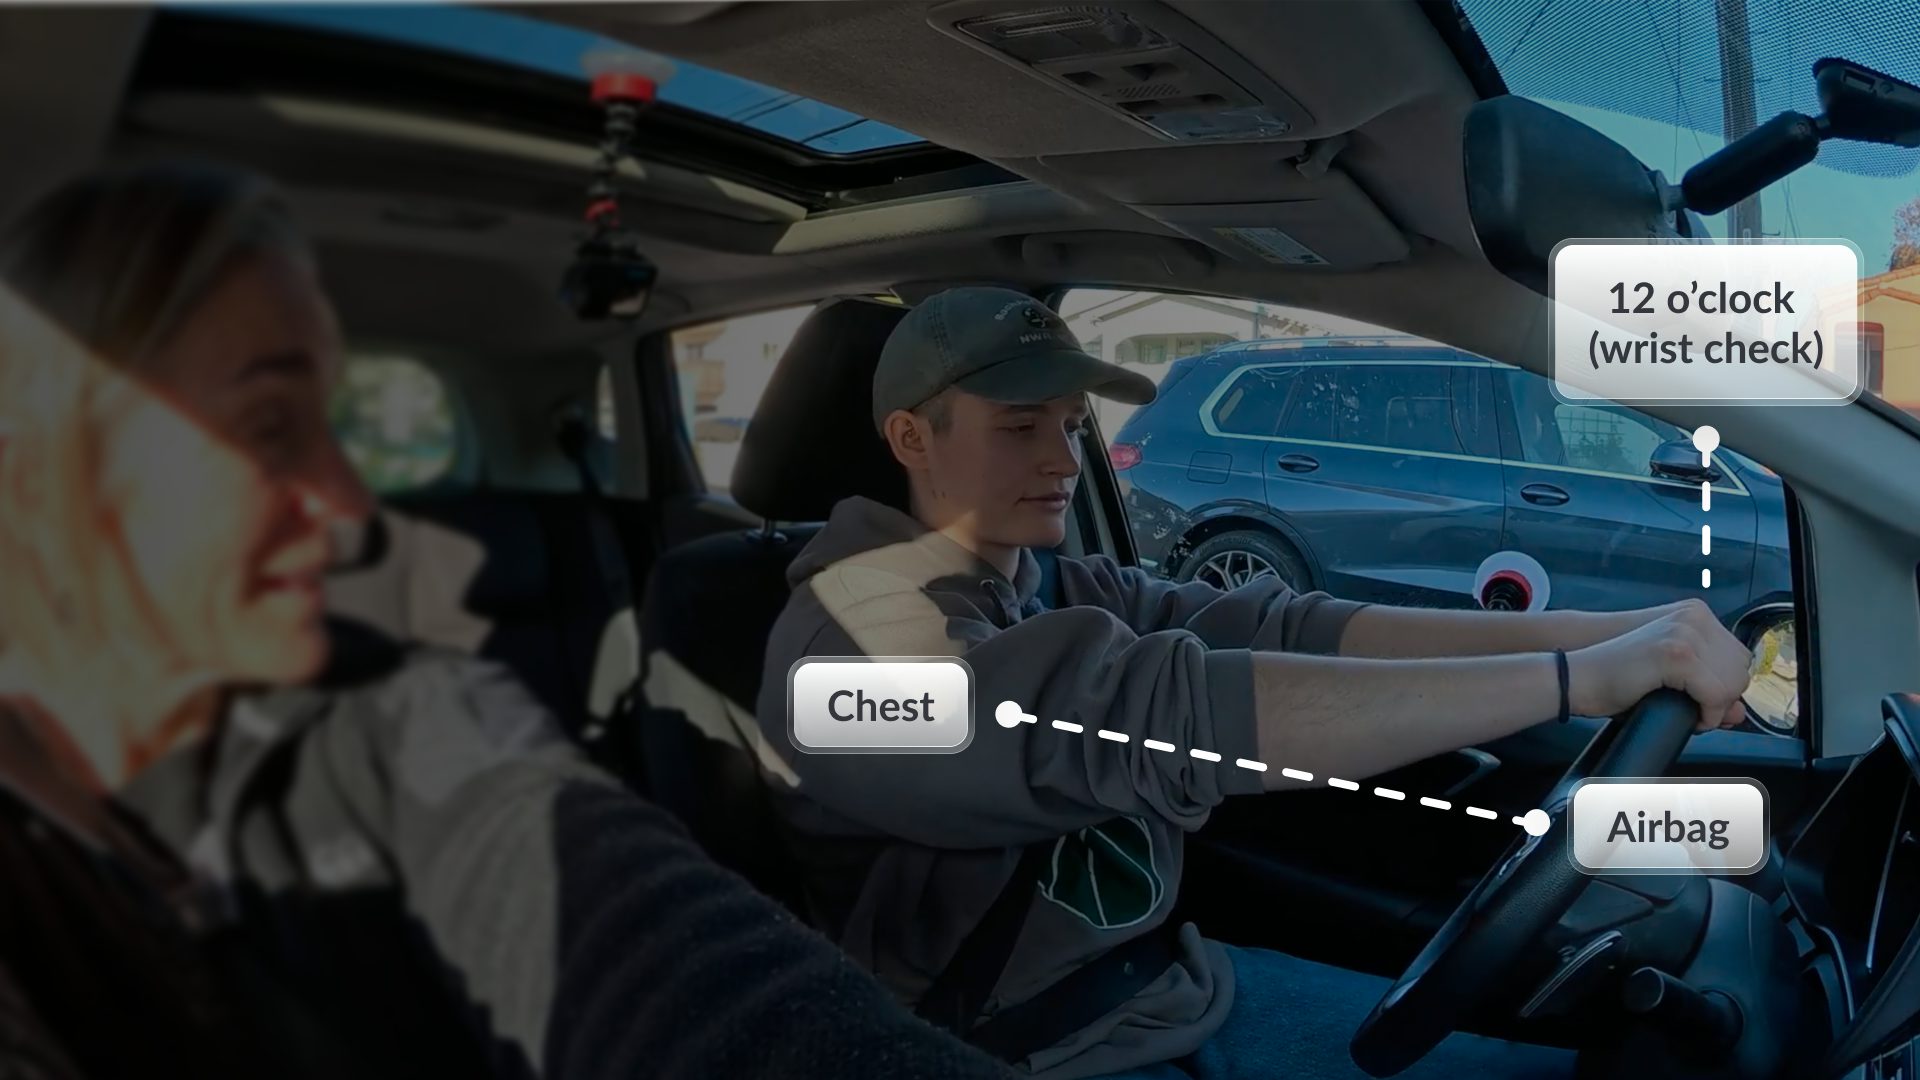
Steering wheel and the Wrist Flex Test
Unlock the steering column lever and adjust height and depth. The wheel should clear your teen's knees and leave the speedometer visible.
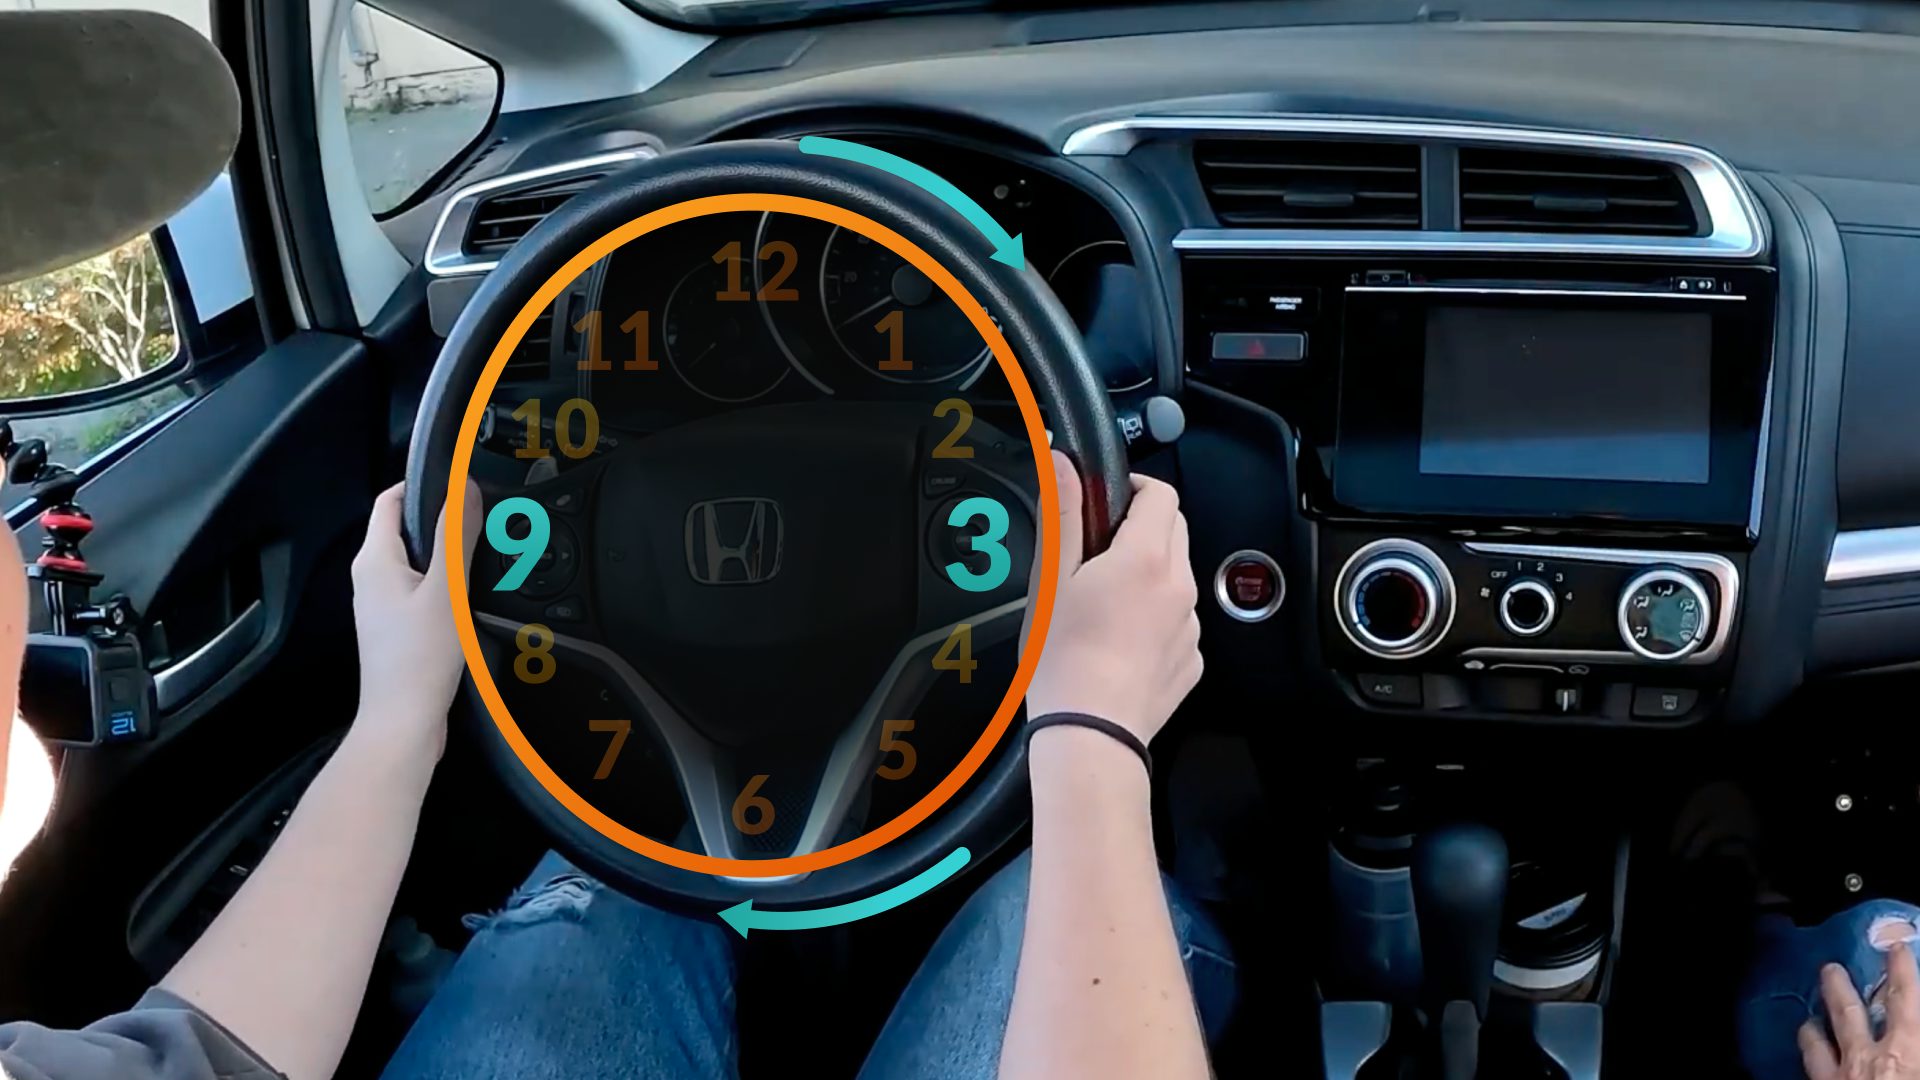
The Wrist Flex Test confirms the distance is correct. Your teen extends both arms over the wheel so their wrists rest on the rim at 12 o’clock, without shoulders lifting off the seat back.
When they drop to 9-and-3, elbows should be relaxed. Keep at least 10 inches between the chest and the center of the steering wheel for airbag safety.
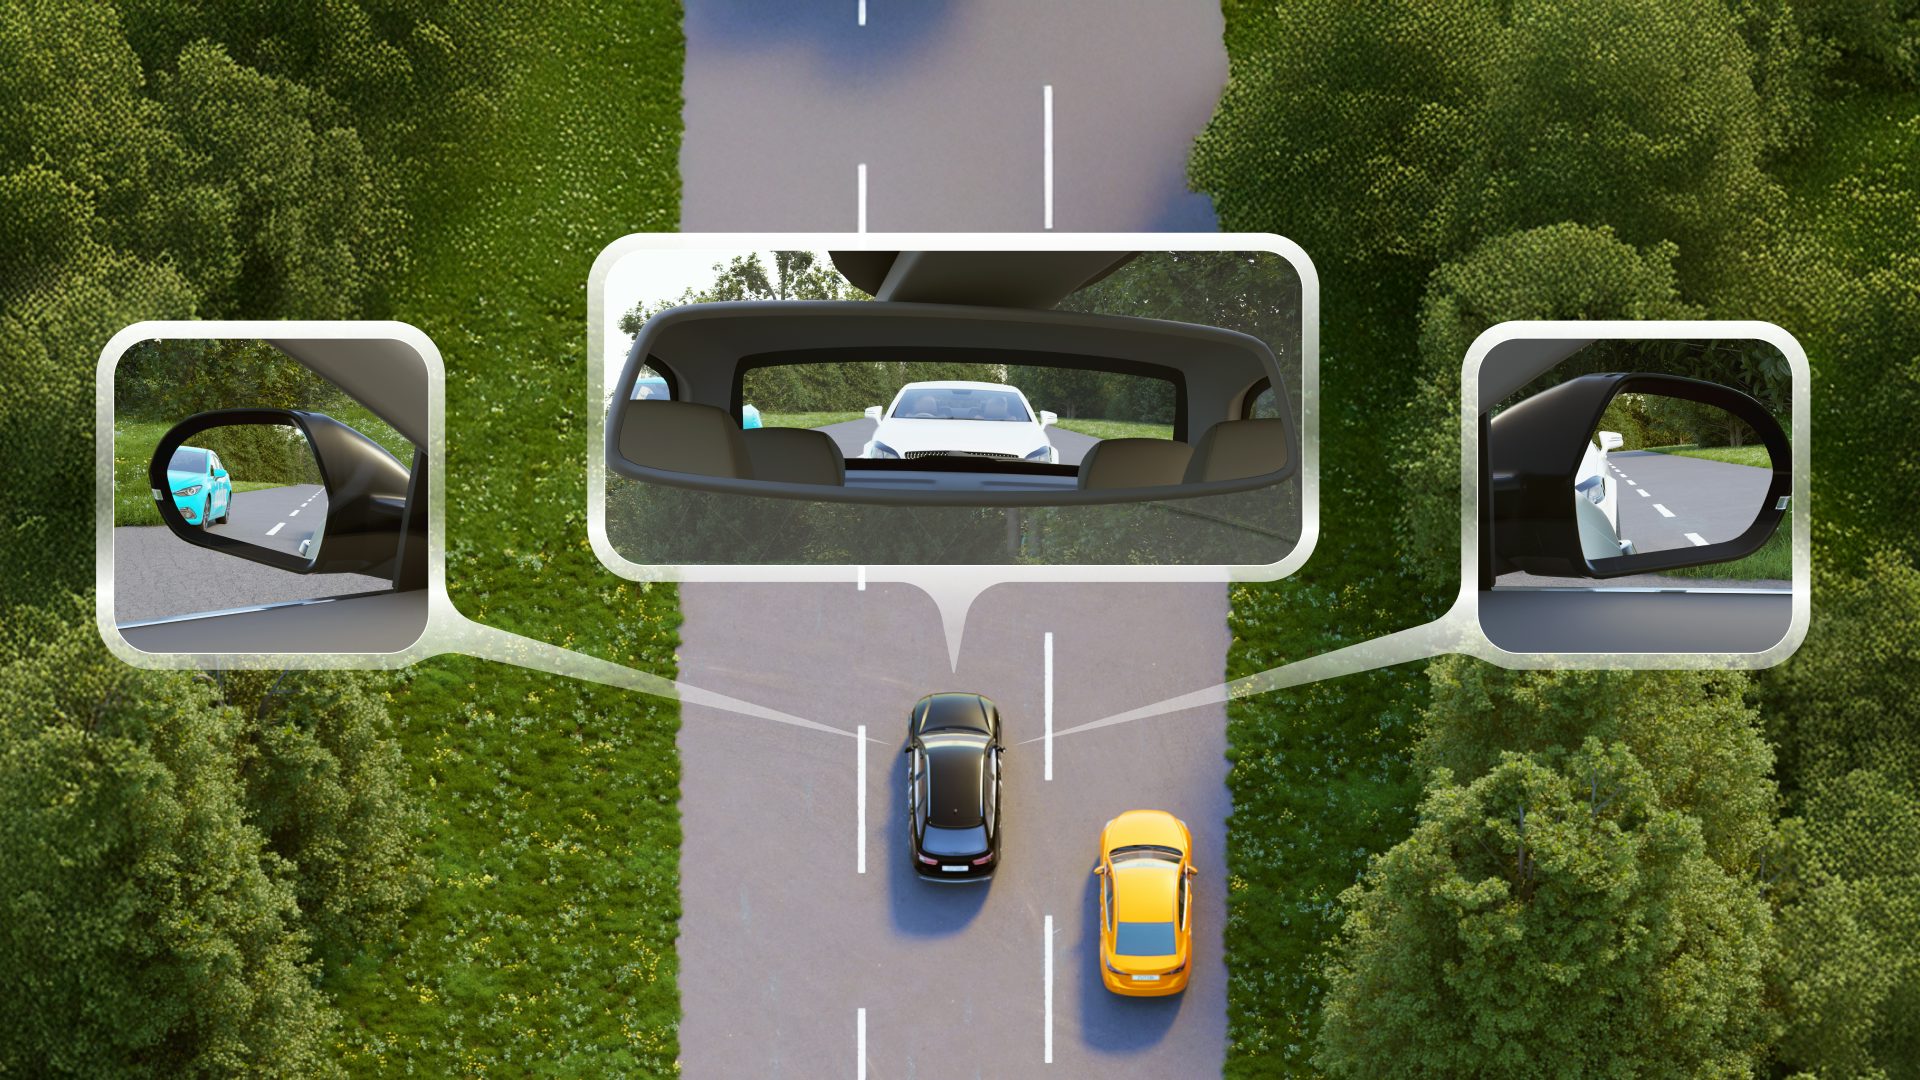
Mirrors
Set mirrors after the seat is locked in. Any seat change invalidates the mirror angles.
- Rear-view: frame the entire rear window without moving the head.
- Left side mirror: about 20% car, 80% road, with the back door handle visible in the bottom-right corner as a reference point.
- Right side mirror: same 20/80 split, with the front door handle pocket visible in the bottom-left corner.
Remind your teen that objects in the right mirror are closer than they appear. The Headlight Rule helps with lane changes: your teen should see both headlights of the car behind in the rear-view mirror before moving over.
During the lesson
Cover one new skill per session. Stacking too many topics overloads a new driver and slows progress.
Agree on a set of commands before the car moves. Your teen should know what each word means and not be surprised when you say it.
Your teen should know in advance that you may grab the wheel, pull the handbrake, or turn off the engine. Frame this as part of the process, not a failure.
If either of you feels overwhelmed or fatigued, stop the lesson. A calm 20-minute session builds skill faster than a stressful hour.
Hard-braking practice builds a reflex your teen will need, but only when it is set up safely. Agree on it in advance so the command never comes as a surprise mid-drive.
Choose an empty lot or a low-traffic road with clear space and no one close behind. Give a calm, agreed cue like "Stop now," and keep the speed low until the stop feels controlled.
Debrief afterward and treat the rush of adrenaline as normal. For the full braking and swerve technique, see preparing for emergencies.
Post-drive checklist
End every session the same way. Consistency reinforces muscle memory for the shutdown and creates space for honest feedback.
Instructor Jacqueline R. teaches a five-step shutdown: Stop-Park-Power-Brake-Exit. Have your teen say the steps out loud until the sequence is automatic.
What went well today?
What should we focus on next time?
Keep it short. One specific observation ("Your mirror checks were consistent today") is worth more than a list of five corrections. Write down the "next time" skill so you both start the following session with a clear goal.
Inside the Zutobi Parent Driving System
The PTTG covers every checklist item on this page across 35 video-led lessons, from the first walk-around to highway merging and night driving.
Instructor Jacqueline R. leads every PTTG lesson on video, walking you through each skill and showing you what to coach.
Driving Checklist FAQ
How often should I run the pre-drive checklist?
Does my teen need to adjust the seat every time?
What is the Wrist Flex Test?
How long should a driving lesson last?
What if my teen gets anxious during a lesson?
Should I correct every mistake in one session?
What does the PTTG include?
Is structured practice better than just logging hours?
Follow a Structured System Inside Zutobi
Give your teen the safety advantage. Start the Zutobi Parent Driving System.
Start for free


